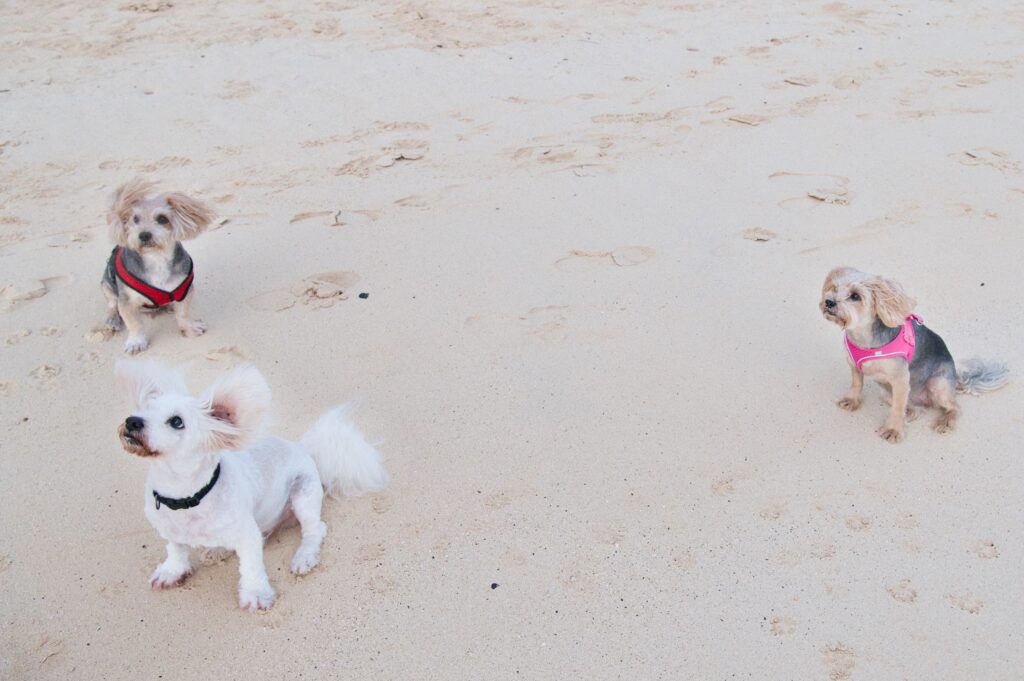
Here’s me playing with some leading lines again. I still feel like for some reason I’m missing the “wow” factor. Maybe I’m just being too hard on myself. Anyway, I want to introduce you to the crew that I call the “puppy parade”
Apparently they more commonly found hiking the pillbox in the morning and she started an instagram called PillBoxPups. You can imagine what they’re all waiting for in this picture…
They’re such a fun crew and tag along behind their owner. Some of my furry sunrise friends!
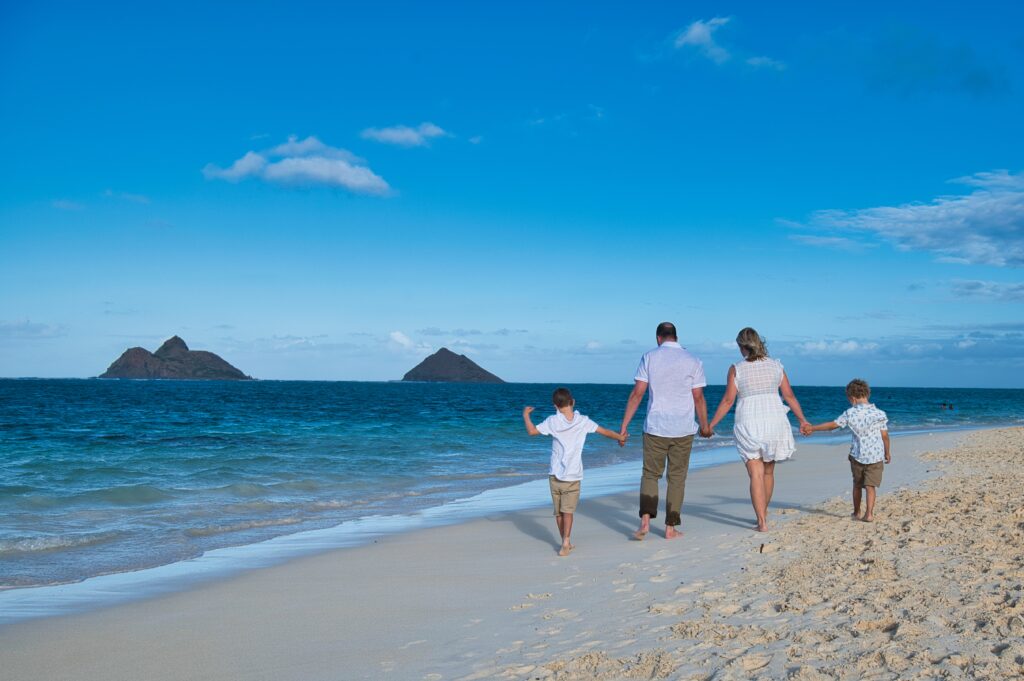
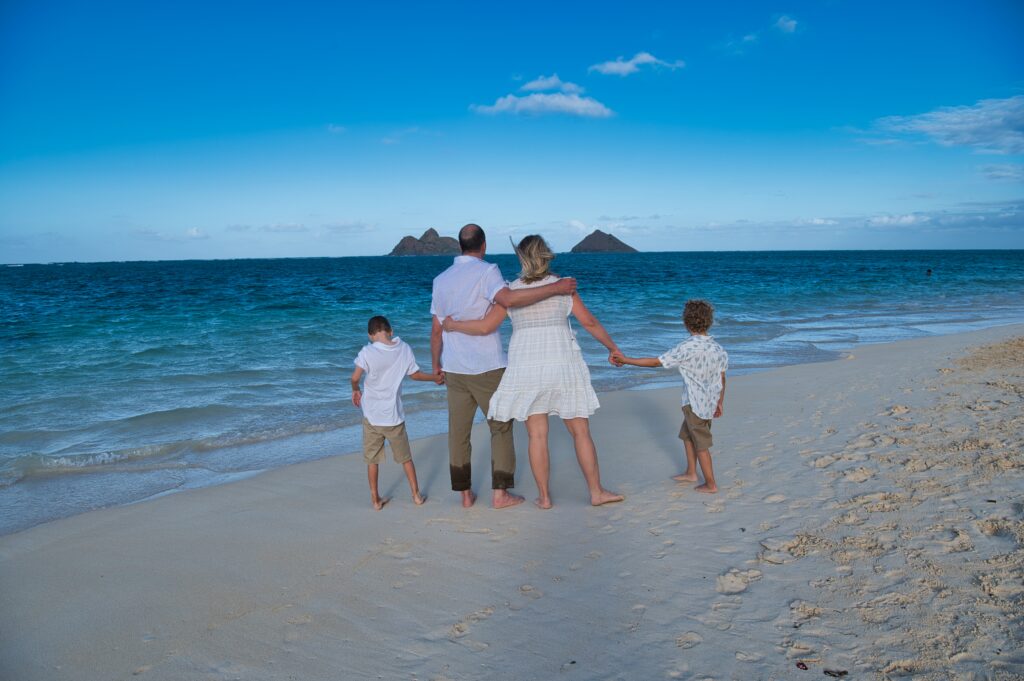
Word gets out quickly about offering affordable photoshoots. A family was coming for vacation and wanted to get some for a Christmas card while they were here, and offered to pay me (ME? Me, a hobbyist photographer?) to grab some pictures of them. I charged them $150 for ~1.5 hours of photography on the beach and some editing. I figured that that’s reasonable for a rookie? I’m kinda winging it here.
I always ask people before I post their pictures on this blog. She kindly requested no faces of the kids, so you’ll miss out on some of the really fun ones, but I loved this session. (I have no idea what we’ll do about the picture and social media and kid thing… thankfully we’re not there yet) The boys were a ton of fun to interact with and the mom came with some specific posing requests, which was helpful.
I’m pretty sure I edited people our of these two pictures, but at this point I can’t remember.
The general flow was some casual walking down the beach to a quieter spot. Taking care of some specific poses in front of the Mokes, next to a boat, etc. Then we let the boys get a little dirty and play in the sand. Some things I learned this session:
Having the kids look into the sun can be tough, so counting down to eyes opening is helpful
Trying to encourage everyone to smile and look at the same time (it’s not as obvious as I’d expect!) I felt like there were a lot of missed shots because one person wasn’t smiling or looking at me.
Learn names earlier (Face palm! So obvious)
There were a lot of the blue jellies washed up, I think because of the wind and storm heading our way. One of the boys had been stung earlier, so they were super conscious about it and made it a bit tougher for relaxed beach walking.
I think the best part is I have a ton of fun doing it. I’m definitely a little nervous leading up to it, but keeping the price so low makes it feel really low pressure.
I ended up with ~600 pictures and edited ~94. I think that’s worth $150, right?
Getting into photography with a professional grade camera has come with the blessing and curse of learning photo editing. Blessing because even with a really professional camera, editing can help improve picture quality. It has also helped me learn to not compare my quality to others because I can tell when a photograph has been edited. Curse because it feels like another huge skillset to develop and more money.
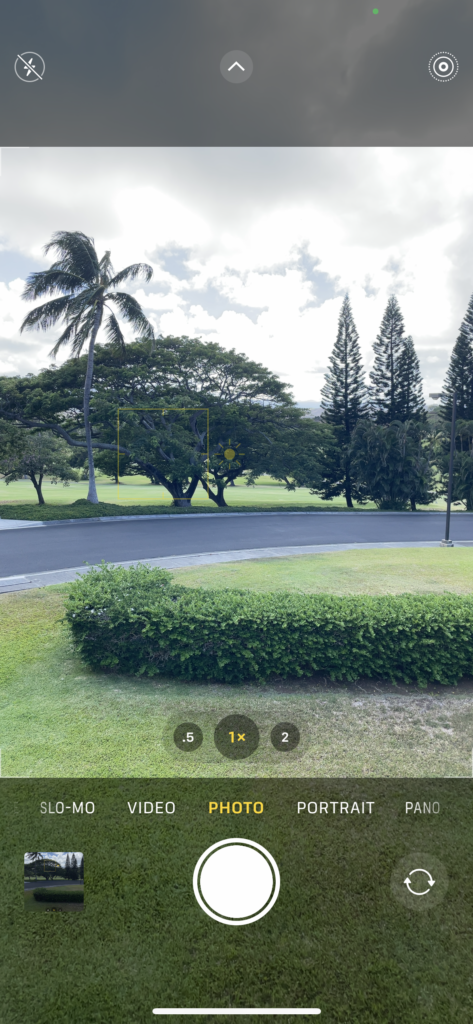
One particular issue cameras have is their dynamic range, or ability to capture bright light and low light at the same time. You most definitely have experienced this trying to take a picture of people in front of the sun. You can either get their faces exposed (the right lighting and visible) and the back is completely bright white OR the back is exposed and you can see blue sky and yellow sun but their faces are black. It turns out the solution doesn’t *have* to be that the object needs to face the sun.
You see what I’m talking about with an iPhone. Find the sun or really bright background, **DO NOT LOOK AT THE SUN WHILE DOING THIS** find an object in front of it, and tap the object. Let it focus and you’ll see a yellow box with a sun around it, which means it’s exposing for the object. Look at the background and it’s bright and not capturing much color.
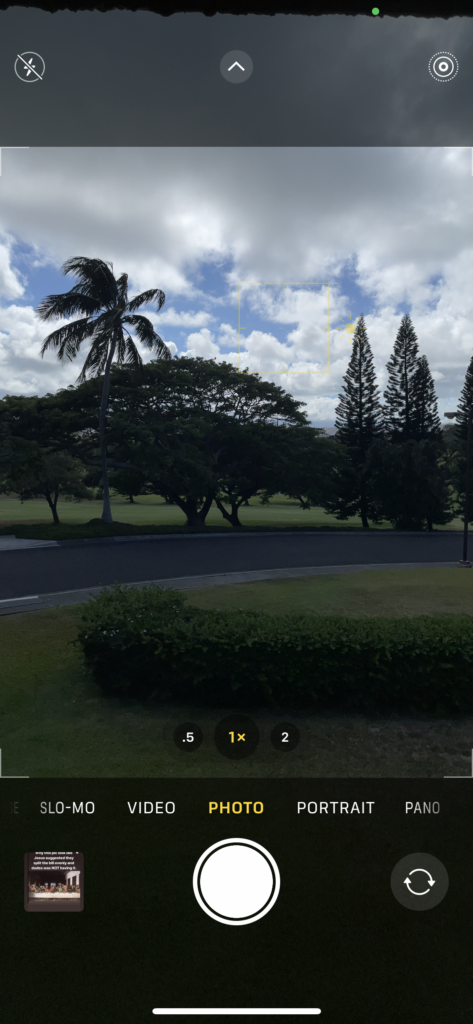
Now tap the background. The yellow box should move to the background and there should be more color captured there. However, the object will be dark.
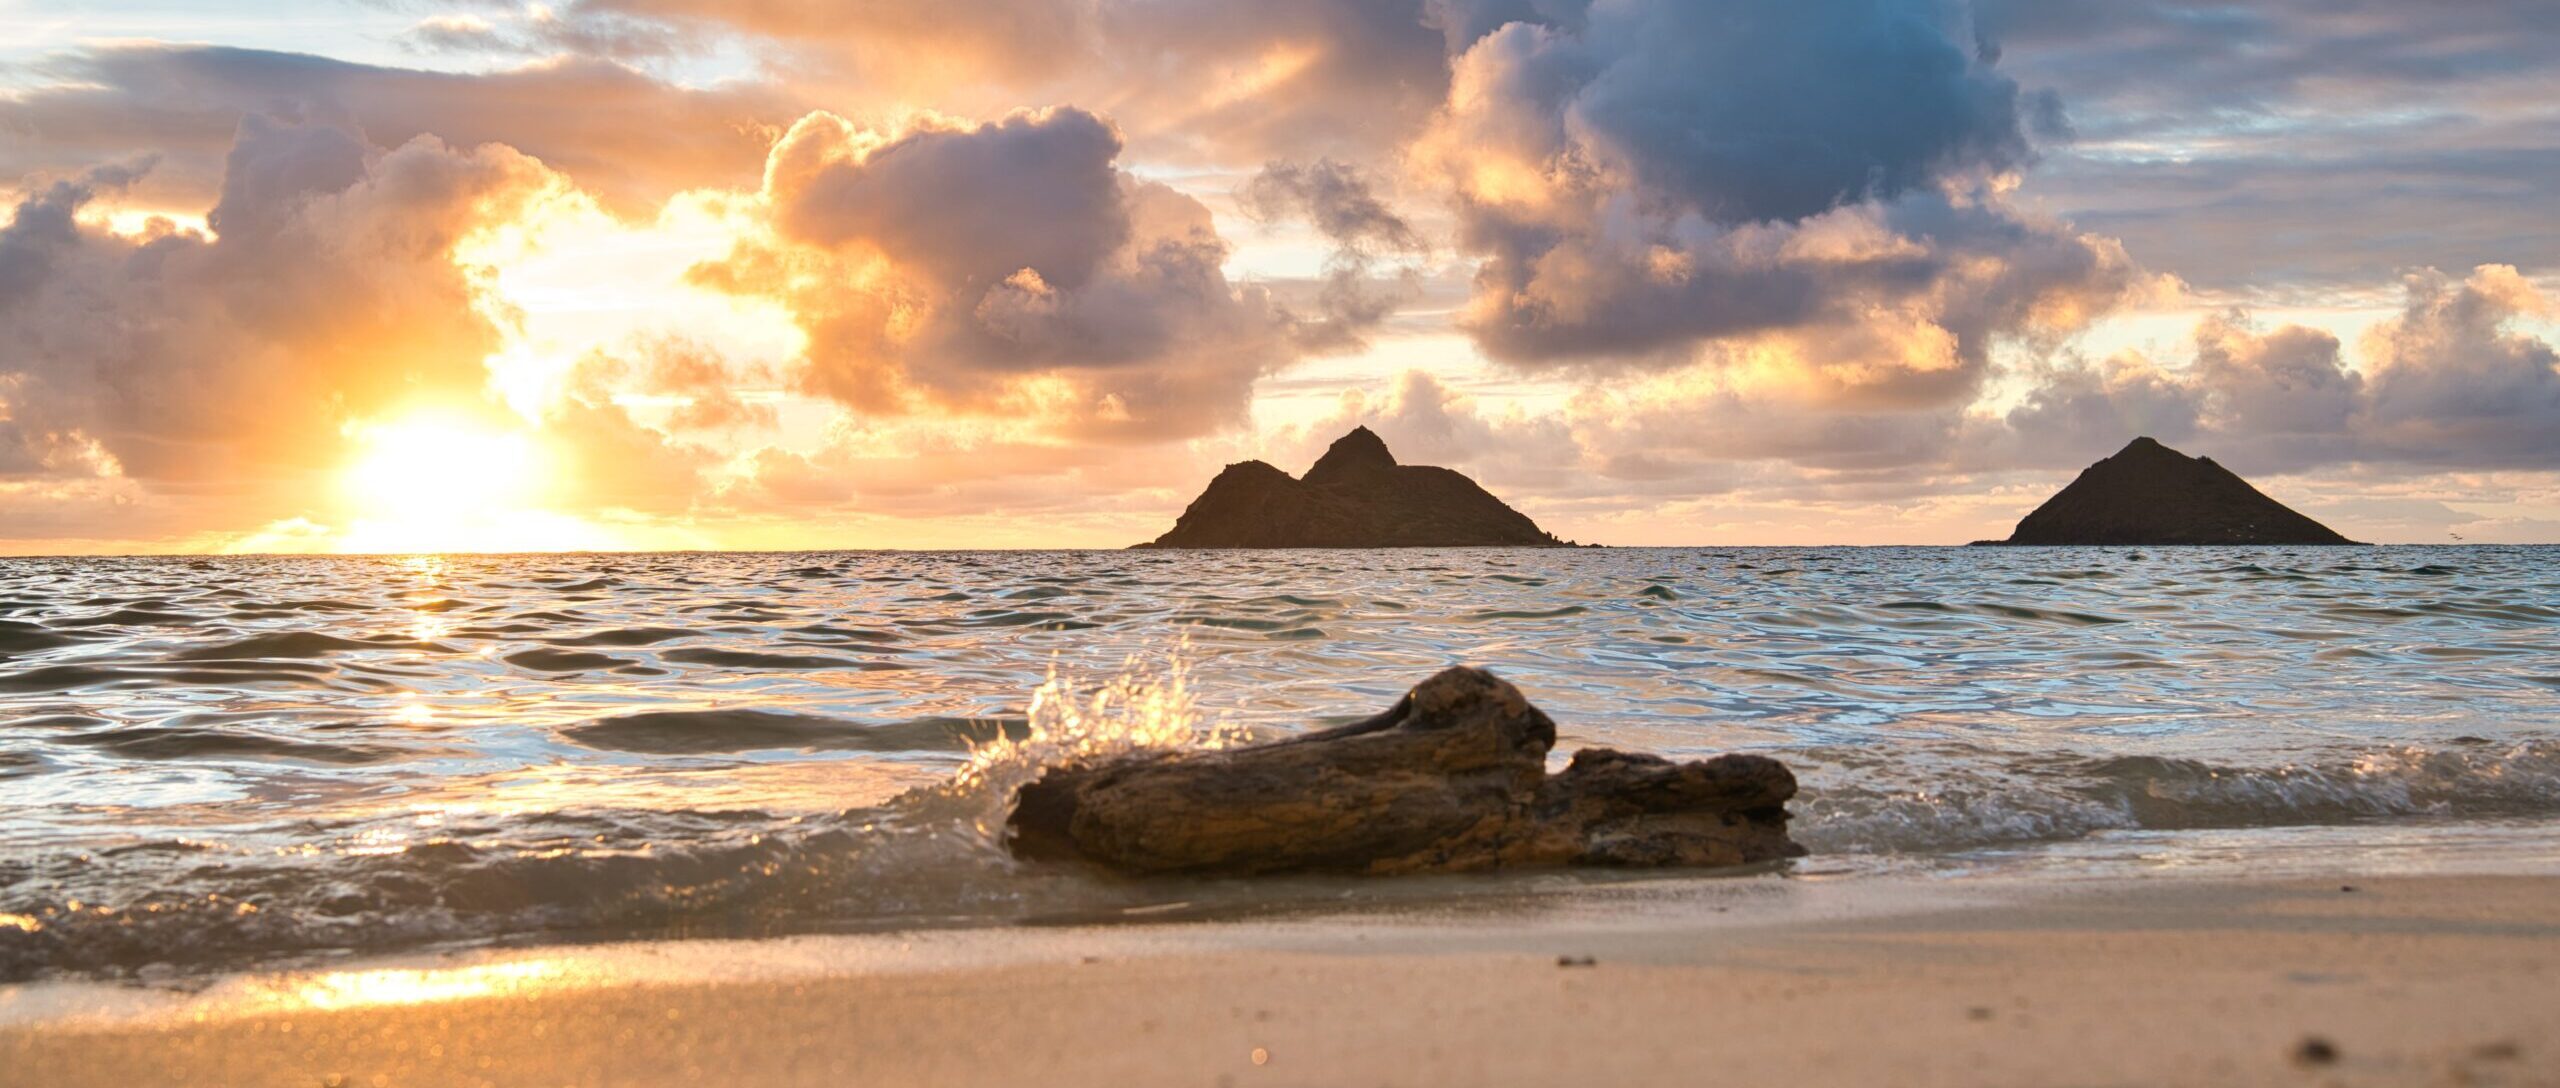
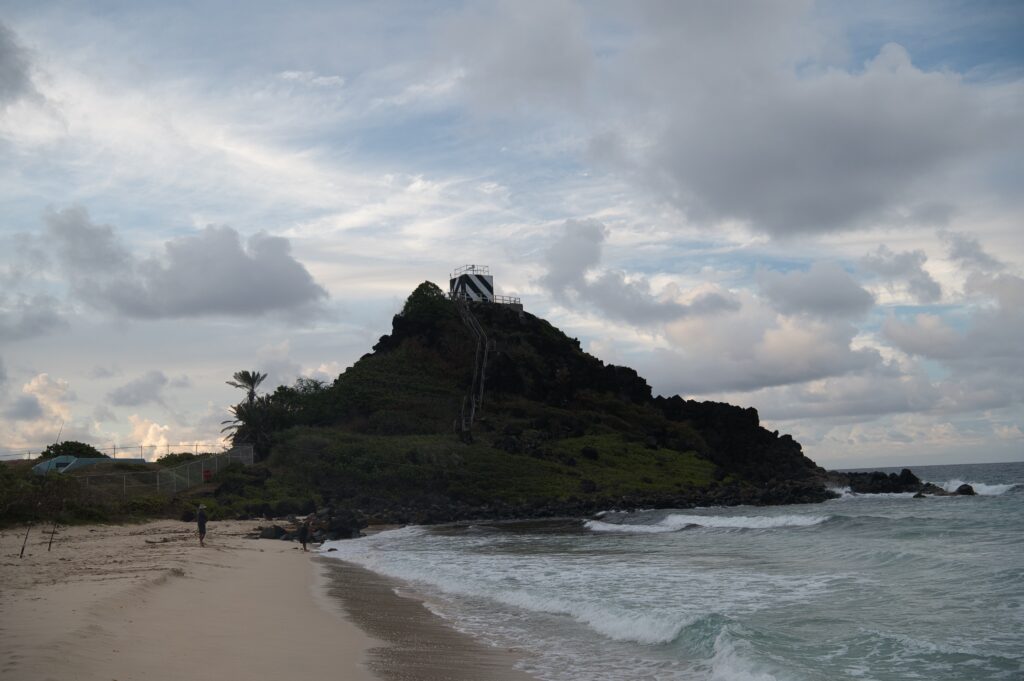
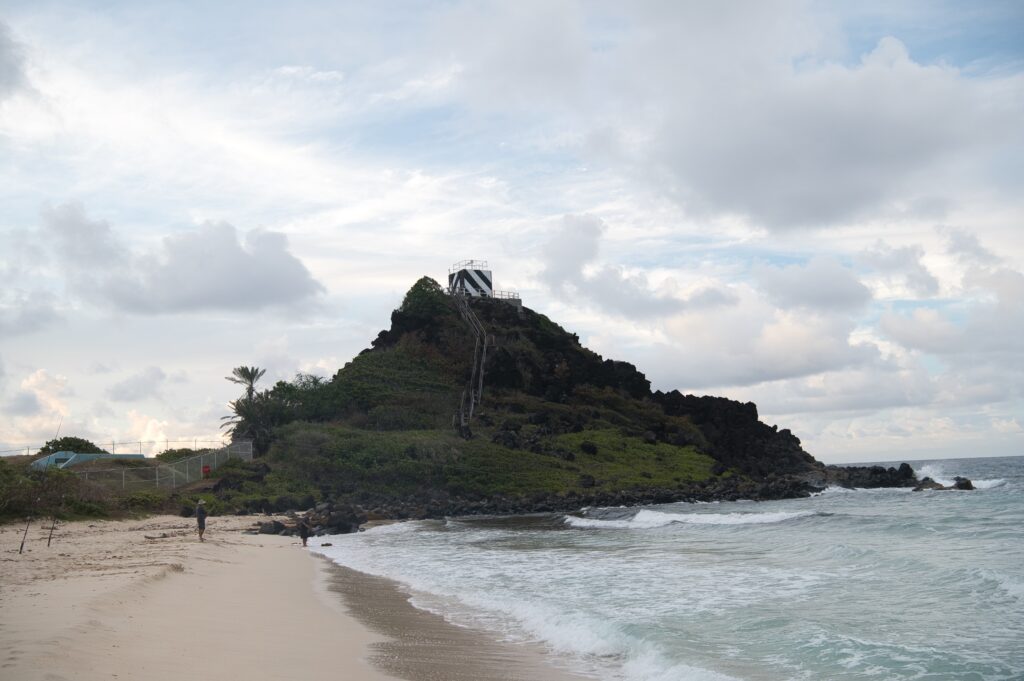
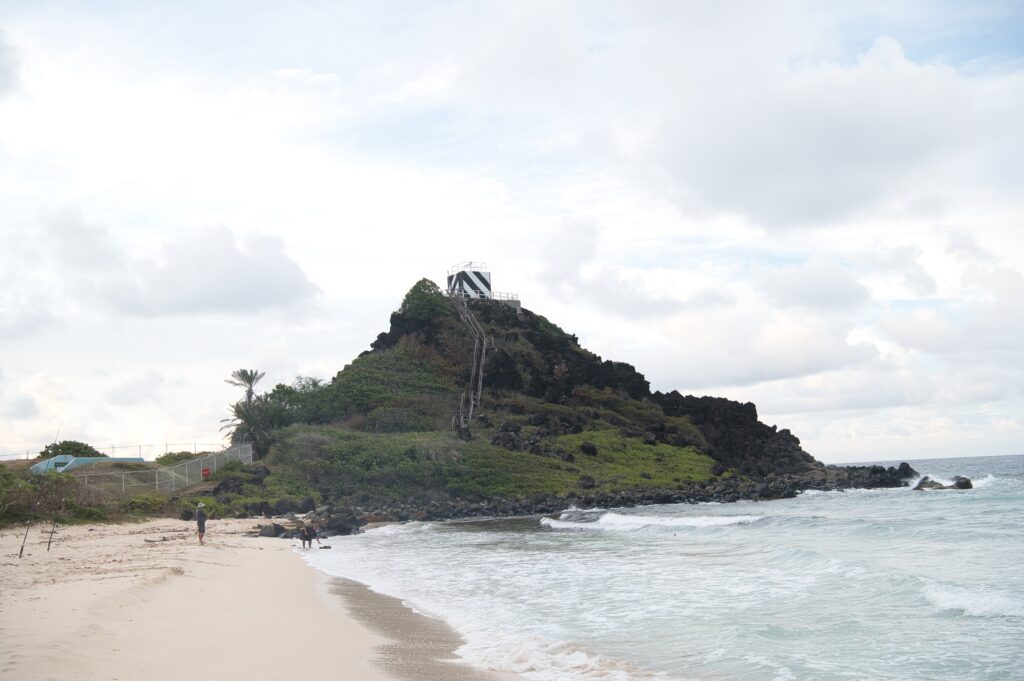
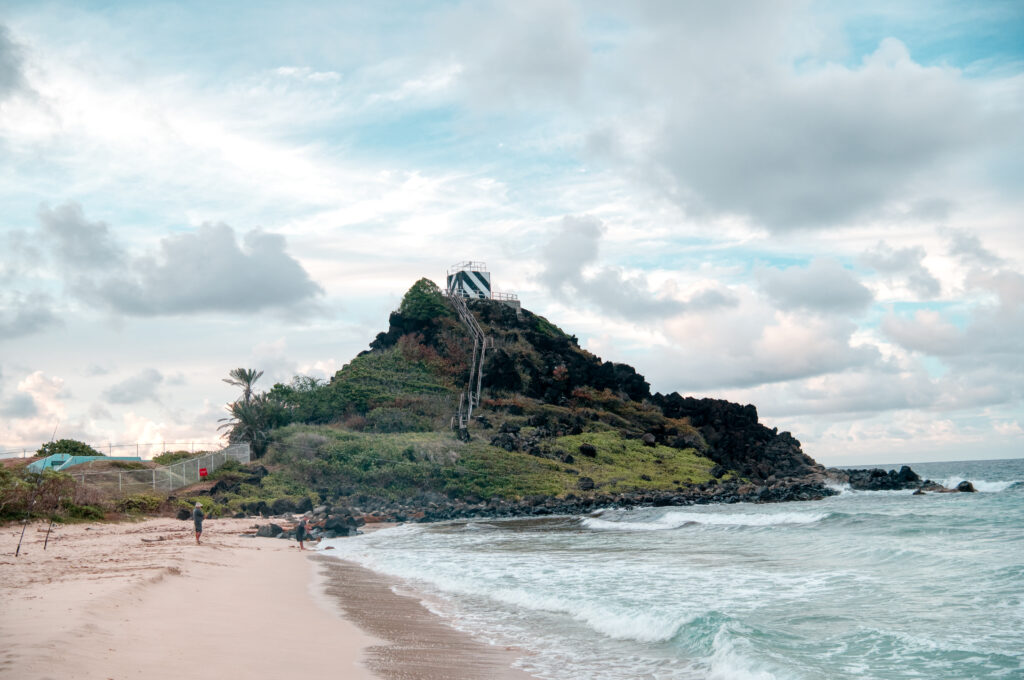
It’s pretty incredible to admit, but professional cameras have this same problem. They’re definitely better at it, but not great. So I had to learn how to change my camera settings and what software to get to take pictures when I experience an environment like this. The process starts with taking a number of photos with different exposures, called “brackets”, like I did above with the tree. Expose the light to get the color for the tree, and expose the light to get the color for the sky. I usually do three, but my camera can do up to 7? 14 maybe? Then use a software to “stack” them. Here are the three I did for the Pyramid Rock beach picture.
Exposed for the light of the sky to get the colorsMiddle “neutral” Exposed for the Pyramid Rock to get the colors
If you’re super interested in the nitty gritty, you can refer to this article and look at the Aurora HDR part, which is what I use. But truly I add pictures to this software and it does the rest.
It’s equal parts colorful in the sky and bright on the rock, which is a lot closer to what the naked eye can see. There are ways to perfect this technique, like using a tripod so the camera doesn’t move between shots, making sure there’s nothing moving in your shot… I also find the sky blue is a tad off from reality; it somehow becomes a more turquoise (I’ve seen this a couple times). I’m sure I could figure out how to color correct. For now I’ve found my basic skill development satisfactory for what I need to accomplish.
I’m also confident you could expose for the sun and work editing magic to make just the pyramid brighter. I think I like the coming out of the camera strategy better.
I try to avoid this because of the editing intensive it is, but it comes in handy.
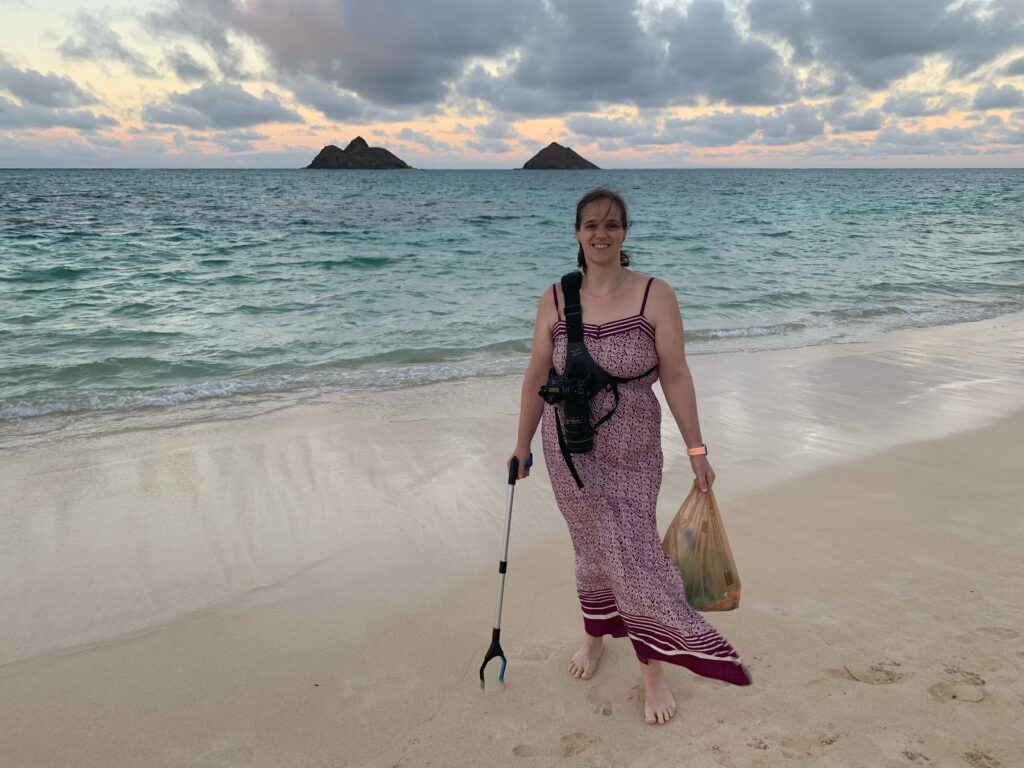
After our road trip it was clear that I needed a better solution to carrying my huge camera that didn’t involve keeping it around my neck or in a backpack. This is where targeted Instagram advertising comes in… I saw an ad for this carrying strap called Cotton Carrier and was sold. It is so helpful in carrying my camera. I wish it would sit a little higher on my body but I think I just need to adjust the straps.
This frees my hands to pick up sea glass or, like in this picture, pick up trash. My schedule has been crazy so I haven’t been in a bit, but when I can I go for walks and take my little grabber and pick up trash. Doing what I can to keep my part of the world a little bit cleaner.