Photography and photo editing skill- Bracket stacking

Getting into photography with a professional grade camera has come with the blessing and curse of learning photo editing. Blessing because even with a really professional camera, editing can help improve picture quality. It has also helped me learn to not compare my quality to others because I can tell when a photograph has been edited. Curse because it feels like another huge skillset to develop and more money.

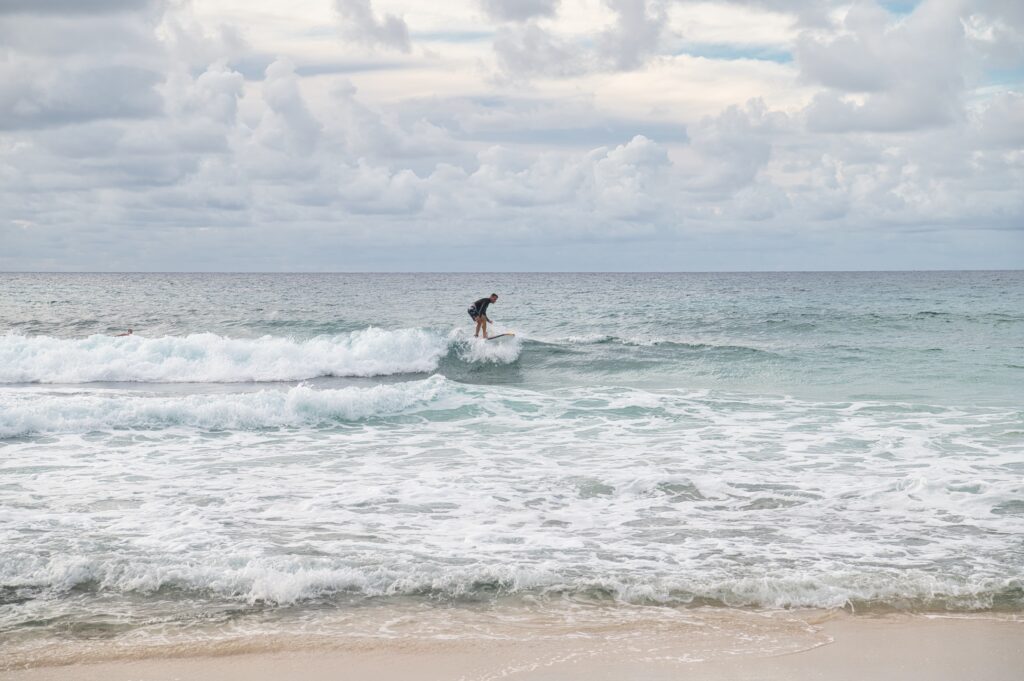
One particular issue cameras have is their dynamic range, or ability to capture bright light and low light at the same time. You most definitely have experienced this trying to take a picture of people in front of the sun. You can either get their faces exposed (the right lighting and visible) and the back is completely bright white OR the back is exposed and you can see blue sky and yellow sun but their faces are black. It turns out the solution doesn’t *have* to be that the object needs to face the sun.

You see what I’m talking about with an iPhone. Find the sun or really bright background, **DO NOT LOOK AT THE SUN WHILE DOING THIS** find an object in front of it, and tap the object. Let it focus and you’ll see a yellow box with a sun around it, which means it’s exposing for the object. Look at the background and it’s bright and not capturing much color.

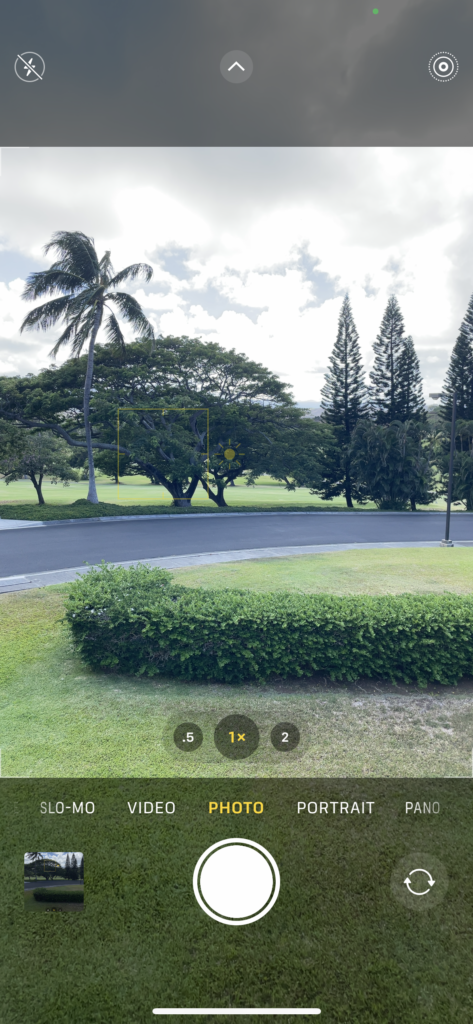
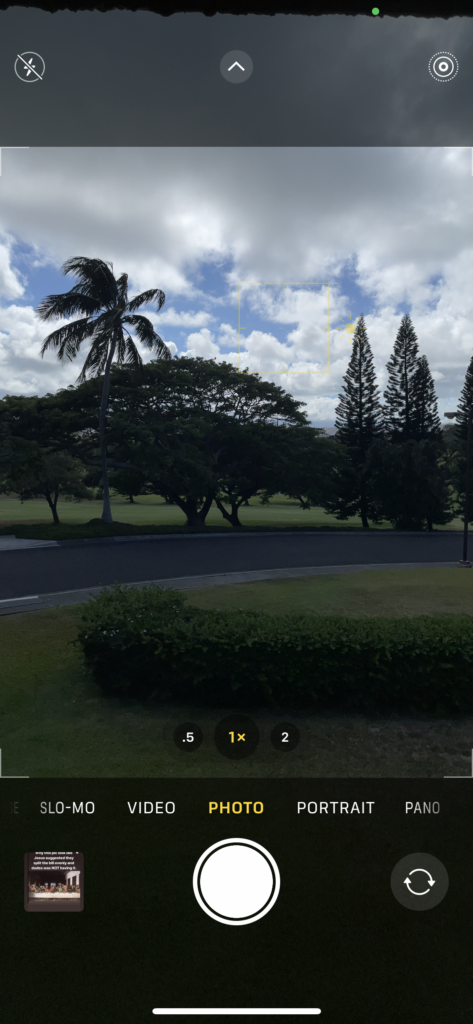
Now tap the background. The yellow box should move to the background and there should be more color captured there. However, the object will be dark.

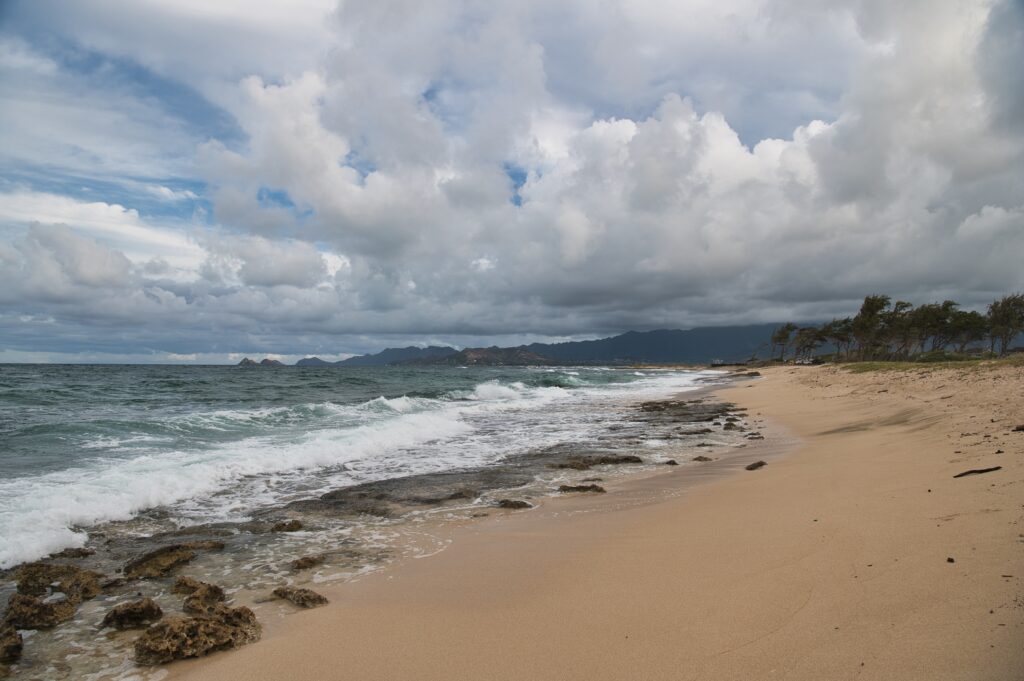
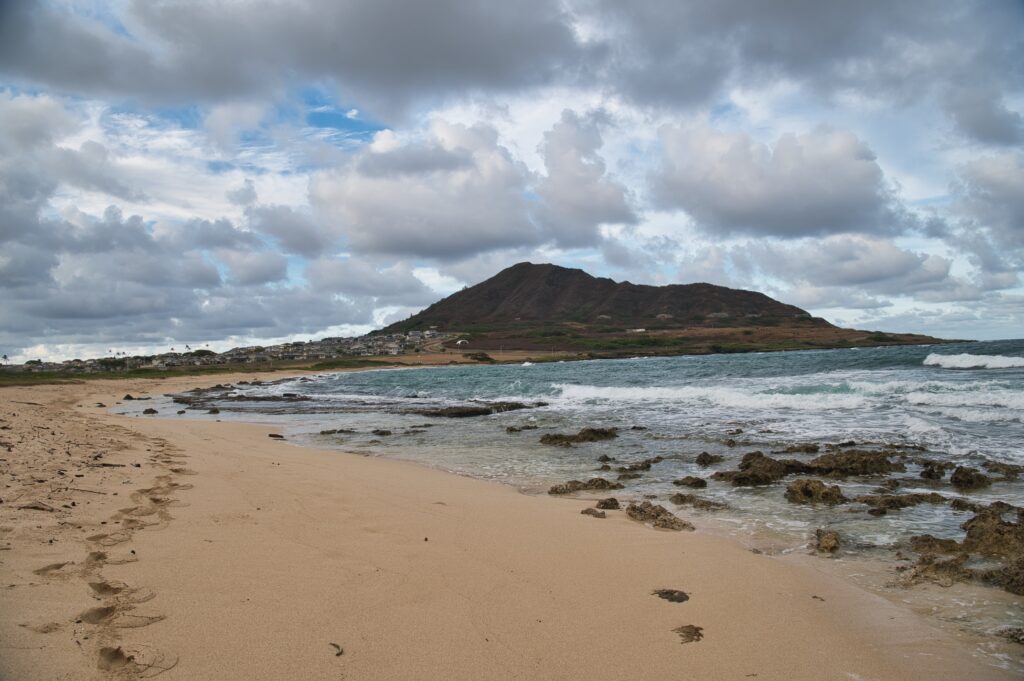
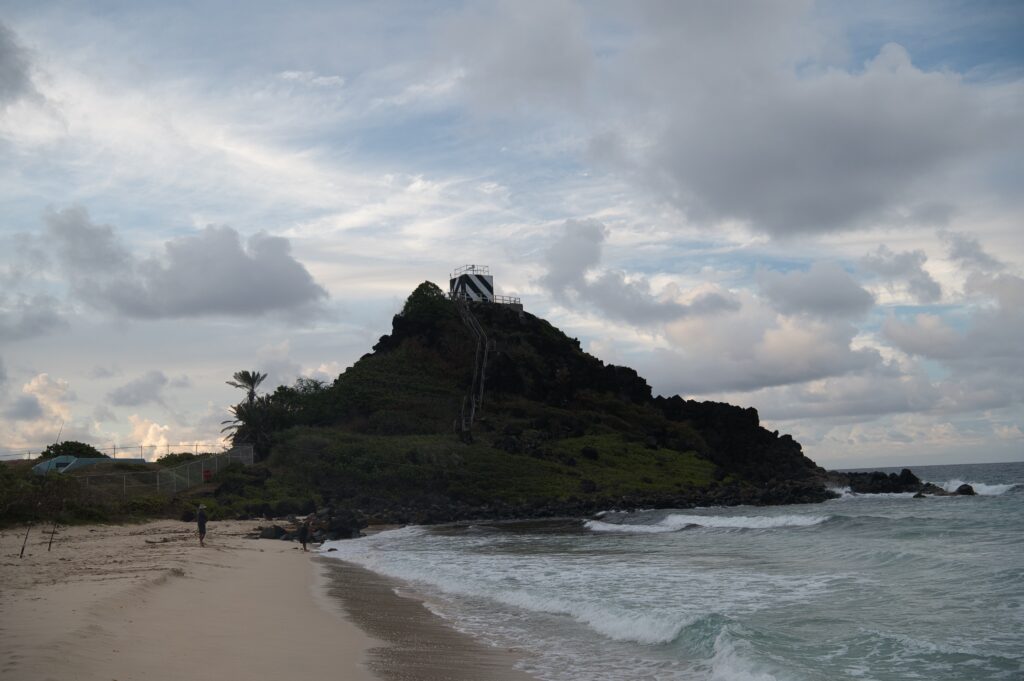
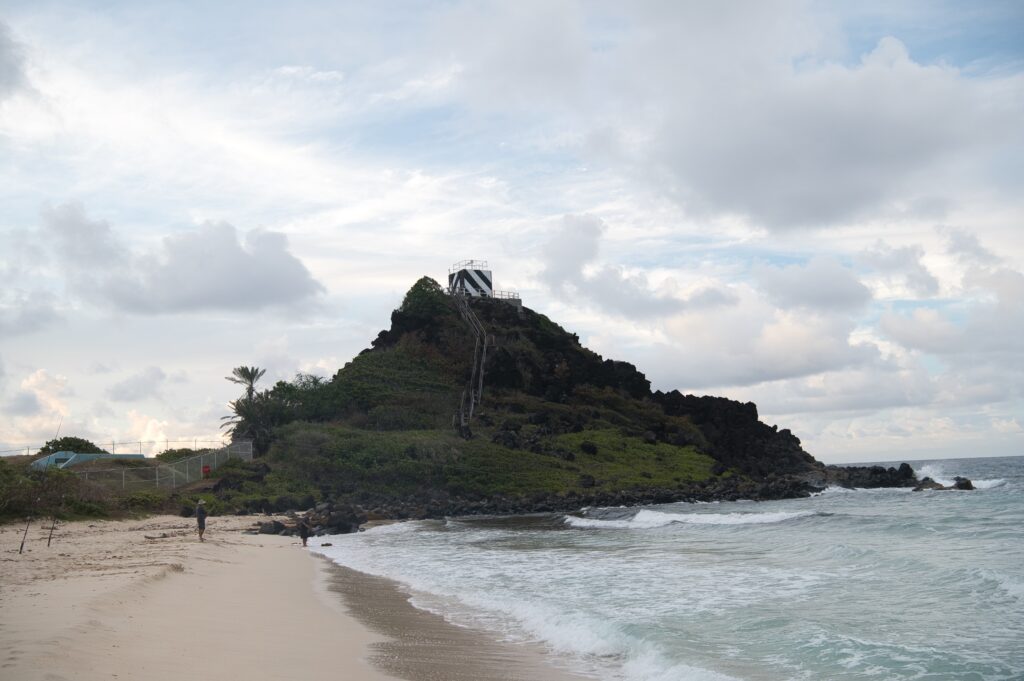
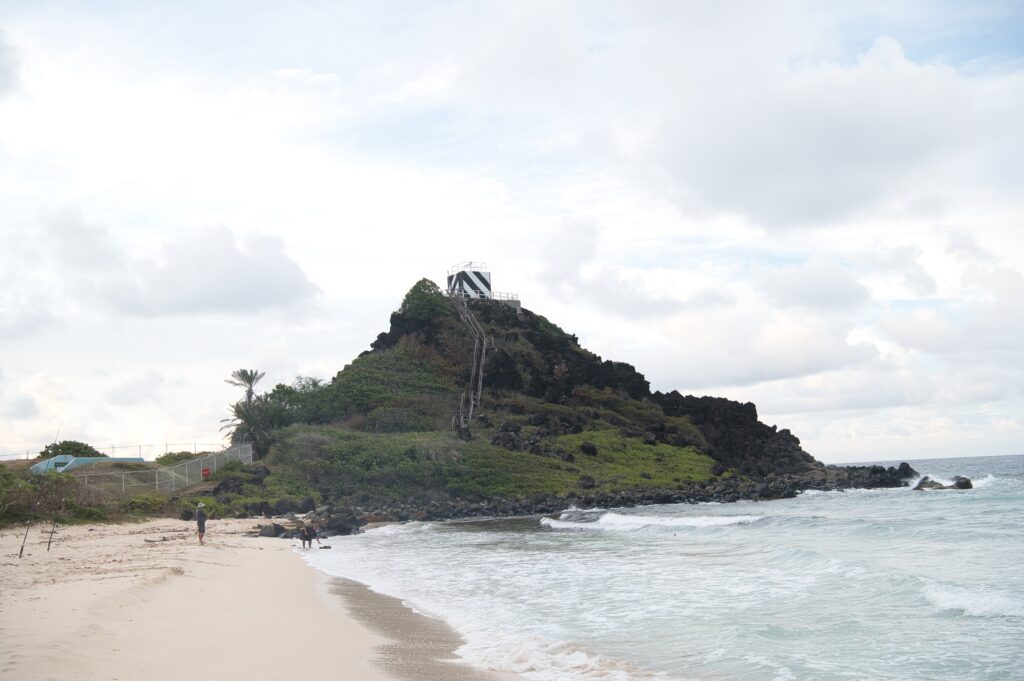
It’s pretty incredible to admit, but professional cameras have this same problem. They’re definitely better at it, but not great. So I had to learn how to change my camera settings and what software to get to take pictures when I experience an environment like this. The process starts with taking a number of photos with different exposures, called “brackets”, like I did above with the tree. Expose the light to get the color for the tree, and expose the light to get the color for the sky. I usually do three, but my camera can do up to 7? 14 maybe? Then use a software to “stack” them. Here are the three I did for the Pyramid Rock beach picture.

Exposed for the light of the sky to get the colors
Middle “neutral”
Exposed for the Pyramid Rock to get the colors

If you’re super interested in the nitty gritty, you can refer to this article and look at the Aurora HDR part, which is what I use. But truly I add pictures to this software and it does the rest.

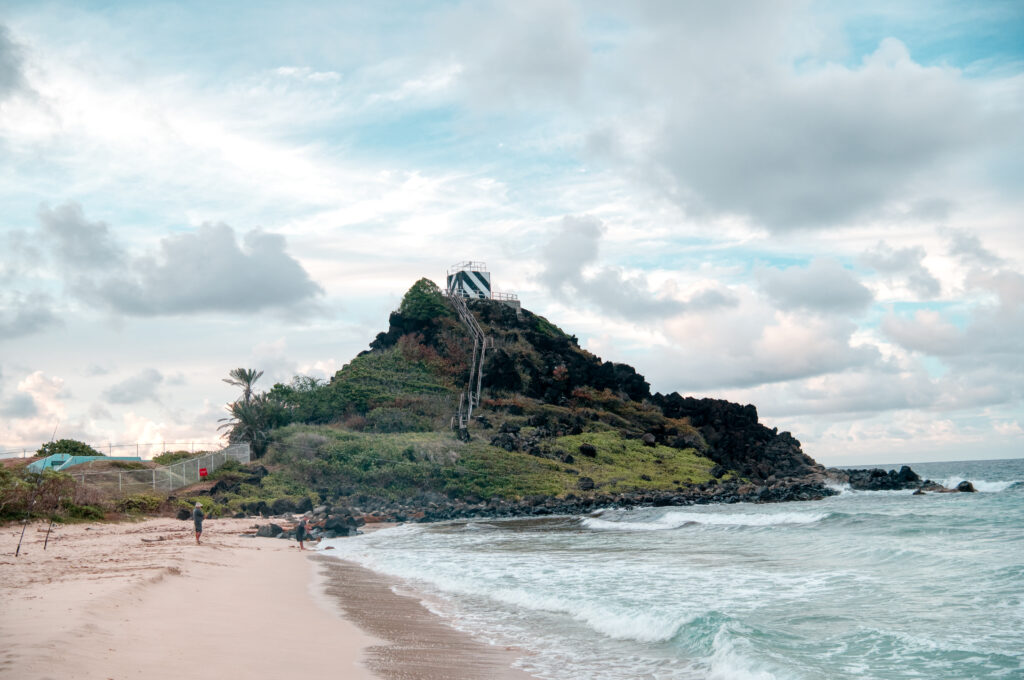
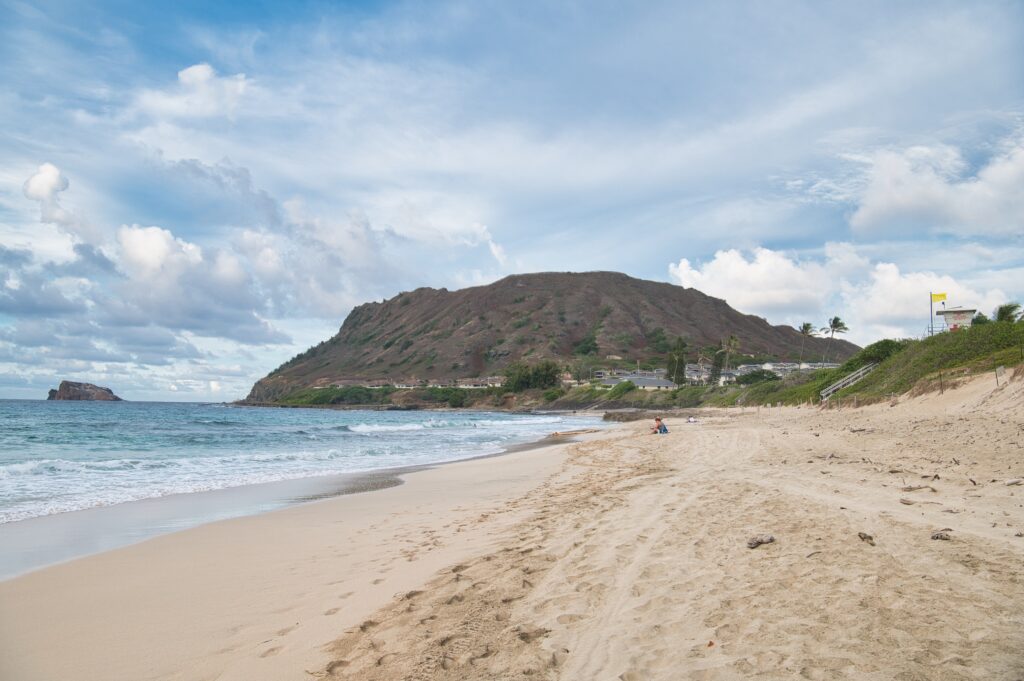
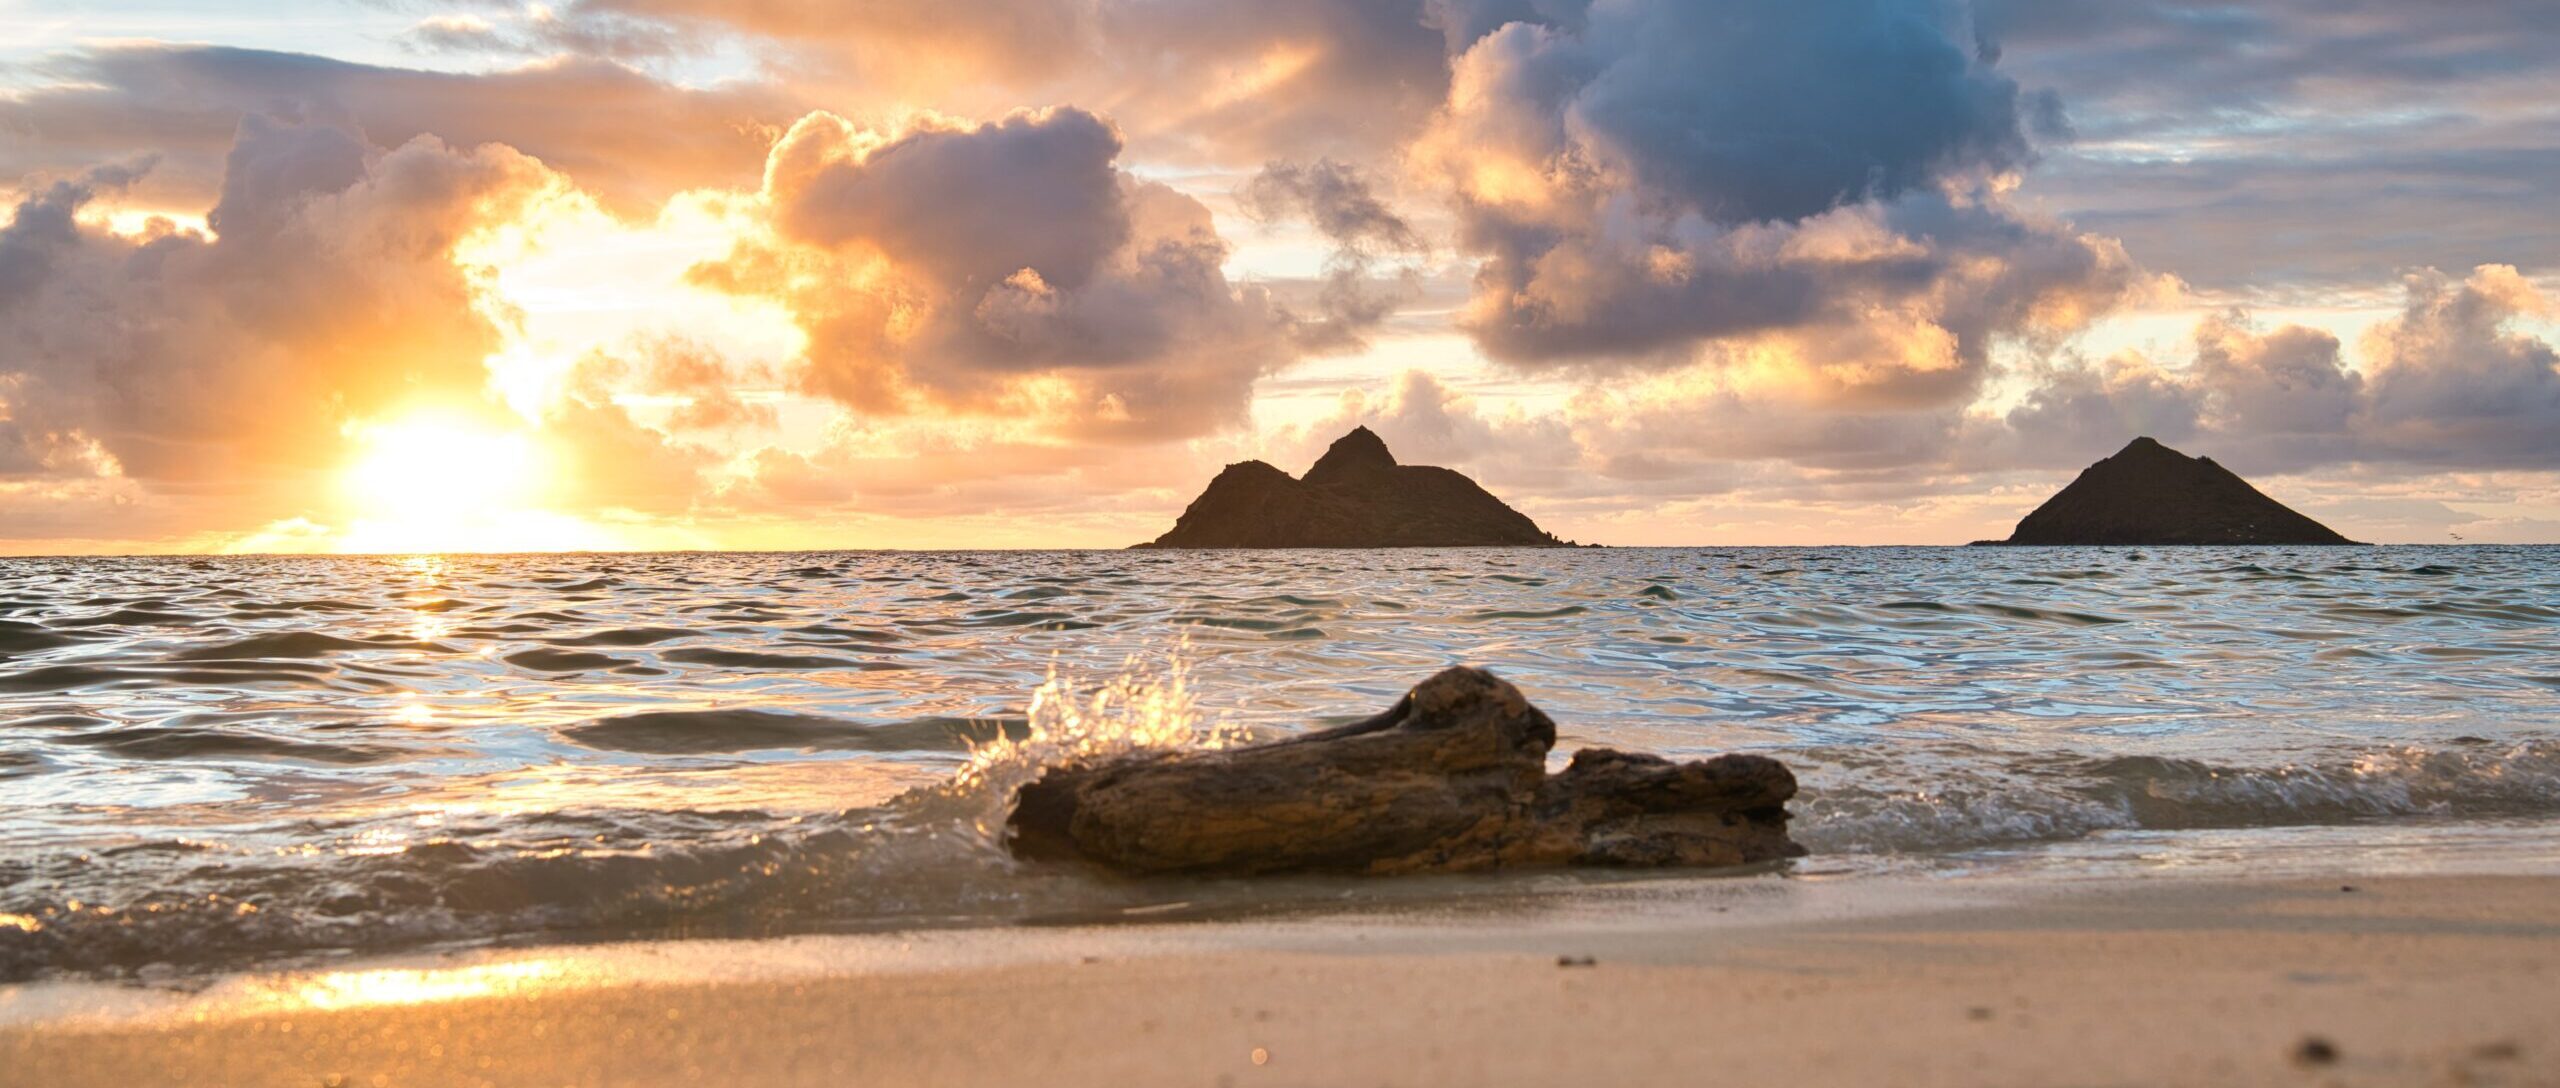
It’s equal parts colorful in the sky and bright on the rock, which is a lot closer to what the naked eye can see. There are ways to perfect this technique, like using a tripod so the camera doesn’t move between shots, making sure there’s nothing moving in your shot… I also find the sky blue is a tad off from reality; it somehow becomes a more turquoise (I’ve seen this a couple times). I’m sure I could figure out how to color correct. For now I’ve found my basic skill development satisfactory for what I need to accomplish.

I’m also confident you could expose for the sun and work editing magic to make just the pyramid brighter. I think I like the coming out of the camera strategy better.

I try to avoid this because of the editing intensive it is, but it comes in handy.

Continue Reading

The definitive guide to MCBH beaches, part 1

All beaches in Hawaii are public beaches. However, the Marine Corps Base Hawaii (MCBH) has 5 beaches that you can only access if you have base access. #workperks However, you can apply for base access even if you’re a civilian and it’s good for one year. The pictures don’t have the best lighting, it was cloudy, but I was tired of waiting for the perfect day to photograph, so you’ll just have to pretend or come see for yourself.

There are five beaches on the MCBH. This post will talk about three of them, and I’ll get to the other two eventually. First up is Fort Hase Beach (pronounced Hah-see). It’s probably the most convenient to the gym/main part of base. It overlooks Kailua and Lanikai, the area where I live.

Then looking left you can see base housing.

There is a lot of reef and rocks sticking up out of the water, which makes it difficult to swim. The surf is also really high. According to my friend, during low tide it creates a lot of fun tide pools for kiddos to use, but I haven’t been at low tide so I haven’t been able to verified that. Lots of sea glass opportunities. There is some open area for swimming without reef. And as you can see, I currently have the entire beach to myself (4pm on a Friday, though).

  • Convenience: A+
  • Parking: A+ (paved option and designated)
  • Swimmable: C-
  • Lifeguards: No
  • Bathroom: Port-o-potty
  • Sea glass: B+

Up next is North Beach. This is the beach that Brian and I ran (trotted) during the surf and turf 5k. It’s a little further away than Ft. Hase. There isn’t any real parking lot for it, just street parking. You have to take stairs down to get to it. More rocks on the shoreline, but I think more room without rocks.

Toward the right side of the first picture you’ll see a pyramid shaped rock. That’s by the third beach I’ll talk about next. North Beach is a popular beach for surfers. (I need to work on remembering to up my shutter speed during action photos, this is a little blurry).

All beaches have a lot of signs about who to call if you see wildlife in danger or nesting. There were a couple of these roped off nesting spots on North Beach. I wonder if the turtles approve of the imposed redecoration. Unfortunately, no actual turtle sighting.

This had more people on the beach, I think because it has more swimming space. It can be rough surf.

  • Convenience: B
  • Parking: C (street)
  • Swimmable: B
  • Lifeguards: Yes
  • Bathroom: No?
  • Sea glass: D

The third and final beach for this post is Pyramid Rock beach, which is essentially adjacent to North Beach. This first picture will look very similar to the one from North beach in the same direction.

This is the picture of its namesake, that Pyramid rock I mentioned earlier. (Tangent about photography. To create this picture I actually stitched together three different exposed pictures. Having the setting sun reflect bright in the clouds would wash out the sky, but then exposing for the sky would make the “rock” a dark blob. Will write a post about this later).

There weren’t any lifeguards at the time, but I believe there can be on certain days with certain currents. To get to this beach you have to cross the airfield, so it’s a bit far. Crossing the airfield is normally easy, but if they’re doing training exercises you’ll get stuck behind a gate (think railroad crossing except for planes).

  • Convenience: C
  • Parking: B (dirt patch)
  • Swimmable: B+
  • Lifeguards: Sometimes?
  • Bathroom: No?
  • Sea glass: D

Another #workperk is some of the recreational activities available to us. Here is a beach cottage you can rent out on the MCBH (there are a few on this side of base). Civilians can’t be unaccompanied without applying for access first, but if you came and visited we could rent one out and get you a pass. They supposedly book quickly though.

Moral of the story, MCBH has quite a few beaches if you’re looking for a quiet respite from the tourists, or for a quick walk on a different beach after the gym. I’ll recap the last two when I get pictures of them. Three beaches in one day is a lot!

Continue Reading